Monday, 9 October 2017
Wednesday, 2 March 2016
How to Access Another Computer from Your Computer (With Smartphone)
How to Access Another Computer from Your Computer
Ever wish you could access some files on your work computer when you’re sitting in your home office? Need a report from your home computer that’s due in class? You can configure your computers to be accessible anywhere in the world, from virtually any other computer. There are a variety of ways to do this, including built-in tools, downloadable programs, and browser-based solutions. Read on after the jump to learn how.
Windows Remote Desktop (PC)
Enable Remote Desktop on the computer you want to access. On the Windows PC that you want to access, you will need to enable Remote Access so that other computers can connect to it. You can enable this on the Pro or Enterprise versions of XP, Vista, 7, and 8. This method requires that you be on the same network as the computer you want to access, either through the router or through a VPN.
- Press the Windows key + Pause to open the System menu. An alternative method is to click the Start menu, open up the Control Panel, click System and Security, then click System.
- Click the “Remote settings” link on the left side of the window.
- Check the “Allow remote connections to this computer” box. You can adjust some of the advanced options, such as length of time an invitation is good for, by clicking the “Advanced” button.
Step 2 -
Add users. You will need to set which users can log in remotely on that machine. Click the “Select Users” button, and then click the Add button. Choose which users you would like to add.
Step 3 -
Find the system name. When you connect to the computer, you will need to know the system name. You can find this by pressing Windows key + Pause and looking for the “Computer name” entry.
Step 4 -
Disable Sleep mode. You will not be able to connect to a computer that is Sleeping or in Hibernate. Make sure to disable these if you want to connect remotely.
- Open the Control Panel and then select Power Options. You may have to switch views to see the icon.
- Click the “Change plan settings” link next to your active plan.
- Set Sleep and Hibernate to Never. Click the “Save changes” button when you are finished.
Step 5 -
Connect to the computer. Log on to the computer that you want to use to connect to the remote computer. Click the Start menu and enter “remote desktop connection” into the Search field. Click it to open it.
- Enter in the system name of the computer that you want to connect to.
- Enter in the user name that you are connecting with.
- Click the “Show options” button to open the advanced options for your connection. You can use these options to tweak your connection to give you the best performance, as well as configure the sound and display.
- Click Connect to start connecting to the computer. When the connection is made, the other computer’s display will appear in a window on your computer. You can navigate Windows just like you normally would.
Step 6 -
Open port 3389 to allow connections through the internet. If you want to be able to connect to your remote computer directly over the internet, without having to use a VPN, you will need to open port 3389 on the firewall of the computer you are connecting to. This will expose the Remote Desktop to the internet, meaning potentially anyone access it. For this reason, it is highly recommended that you have a very strong password.[1]
- To find out how to open ports on your router, check out this guide.
- Once you open port 3389, you will be able to connect to the computer by entering its public (external) IP address. To find the public IP address, check out this guide. Remember, you will need the IP address of the computer you are connecting to.
Step 7 -
Connect to your remote desktop with a smartphone or tablet. If you are running Windows 8 0r 8.1 Professional, you can connect to your remote desktop through the official Microsoft apps on iOS and Android. You will need to have Remote Desktop configured on your computer.
_______________________________________
Tuesday, 5 January 2016
Learn Basic HTML Part 2
Web Page#11: horizontalruler.html
Object: Demonstration of Horizontal Ruler in HTML.
Source Code
Output
____________________________
Web Page#12: marquee.html
Object: Demonstration of Marquee Tag in HTML.
Source Code
Output
_______________________________
Web Page#13: fonts.html
Object: Demonstration of Font Tag in HTML.
Source Code
Output
___________________________________
Web Page#14: unorderdlist.html
Object: Demonstration of Unordered Lists in HTML.
Source Code
Output
_________________________________
Web Page#15: orderdlist.html
Object: Demonstration of ordered Lists in HTML.
Source Code
Output
_______________________________
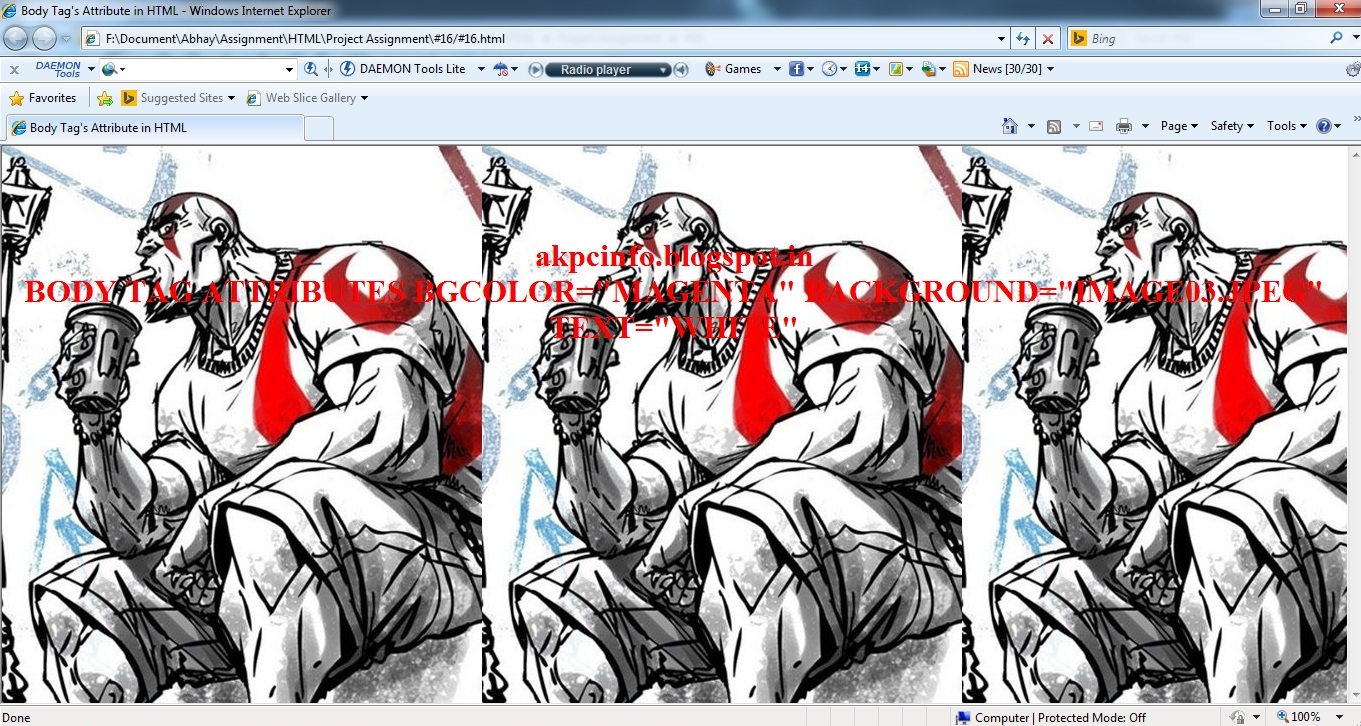
Web Page#16: bodyattribs.html
Object: Demonstration of Body Tag’s Attributes in HTML.
Source Code
Output
Labels:
Learn Basic HTML Part 2,
Learn HTML
Location:
Beawar, Rajasthan, India
Wednesday, 30 December 2015
Learn Basic HTML Part 1
What is HTML?
HTML is a markup language for describing web documents (web pages).
- HTML stands for Hyper Text Markup Language
- A markup language is a set of markup tags
- HTML documents are described by HTML tags
- Each HTML tag describes different document content.
Example Explained
- The DOCTYPE declaration defines the document type to be HTML
- The text between <html> and </html> describes an HTML document
- The text between <head> and </head> provides information about the document
- The text between <title> and </title> provides a title for the document
- The text between <body> and </body> describes the visible page content
HTML Tags
HTML tags are keywords (tag names) surrounded by angle brackets:
<tagname>content</tagname>
- HTML tags normally come in pairs like <p> and </p>
- The first tag in a pair is the start tag, the second tag is the end tag
- The end tag is written like the start tag, but with a slash before the tag name
Note : The start tag is often called the opening tag. The end tag is often called the closing tag.
Web Browsers
The purpose of a web browser (Chrome, IE, Firefox, Safari) is to read HTML documents and display them.
The browser does not display the HTML tags, but uses them to determine how to display the document:
Note : Only the <body> area (the white area) is displayed by the browser.
HTML Versions
Since the early days of the web, there have been many versions of HTML:
Version Year
HTML 1991
HTML 2.0 1995
HTML 3.2 1997
HTML 4.01 2000
HTML 5 2014
Write HTML Using Notepad or TextEdit
HTML can be edited by using professional HTML editors like:
- Microsoft WebMatrix
- Sublime Text
However, for learning HTML we recommend a text editor like Notepad (PC) or TextEdit (Mac).
We believe using a simple text editor is a good way to learn HTML.
Follow the 4 steps below to create your first web page with Notepad.
Step 1: Open Notepad
- To open Notepad in Windows 7 or earlier:
- Click Start (bottom left on your screen). Click All Programs. Click Accessories. Click Notepad.
- To open Notepad in Windows 8 or later:
- Open the Start Screen (the window symbol at the bottom left on your screen). Type Notepad.
Step 2: Write Some HTML
Write or copy some HTML into Notepad.
Step 3: Save the HTML Page
- Save the file on your computer.
- Select File > Save as in the Notepad menu.
- Name the file "index.html" or any other name ending with html or htm.
- UTF-8 is the preferred encoding for HTML files.
- ANSI encoding covers US and Western European characters only.
Note : You can use either .htm or .html as file extension. There is no difference, it is up to you.
Step 4: View HTML Page in Your Browser
Open the saved HTML file in your favorite browser.
Note : To open a file in a browser, double click on the file, or right-click, and choose open with.
Empty HTML Elements
- HTML elements with no content are called empty elements.
- <br> is an empty element without a closing tag (the <br> tag defines a line break).
- Empty elements can be "closed" in the opening tag like this: </br>.
- HTML5 does not require empty elements to be closed. But if you want stricter validation, or you need to make your document readable by XML parsers, you should close all HTML elements.
____________________
Programs Code
Web Page#1: structure.html
Object: Demonstration of Basic Structure of an HTML Document
Source Code
Output
________________________________
Web Page#2: headings.html
Object: Demonstration of Heading Styles in HTML
Source Code
Output
_______________________________
Web Page#3: paragraphs-breaks.html
Object: Demonstration of Paragraphs & Line Breaks in HTML.
Source Code
Output
___________________________________
Web Page#4: textformatting.html
Object: Demonstration of Text Formatting Tags in HTML.
Source Code
Output
_______________________________
Web Page#5: computeroutput.html
Object: Demonstration of Computer Output Tags in HTML.
Source Code
Output
___________________________________
Web Page#6: abbreviation-acronym.html
Object: Demonstration of Abbreviations & Acronyms in HTML.
Source Code
Output
_______________________________
Web Page#7: quotations.html
Object: Demonstration of Long & Short Quotations in HTML.
Source Code
Output
_____________________________________
Web Page#8: right2left.html
Object: Demonstration of Right To Left (RTL) or Hebrew Text in HTML.
Source Code
Output
________________________________
Web Page#9: preformatted.html
Object: Demonstration of Preformatted Text in HTML.
Source Code
Output
______________________________________
Web Page#10: comments-address.html
Source Code
Output
___________________________________
More Program's In HTML Part 2
_____________
Labels:
Learn Basic HTML Part 1,
Learn HTML
Location:
Beawar, Rajasthan, India
Saturday, 19 December 2015
How to Change a Windows User Password Using Backtrack 4
Locked out of your computer? Wanna hack one of your friends? Can't access an old Windows user account? Then this is the article for you!
Step 1 :
Boot Backtrack 4 in your computer.
Step 2 :
Once Backtrack is done loading and the select menu is visible, pick "Start Backtrack Frame Buffer (1024X768)".
Step 3 :
Once you're allowed to type in commands, type in "startx".
Step 4 :
Once the GUI is visible, go to start(Lower-left corner) Backtrack >> Privilege Escalation >> PasswordAttacks >> Chntpw, opening the Chntpw terminal.
(If it shows error "No such files or directory" check correct path to Chntpw executable in File manager).
Step 5 :
Now inside backtrack, you need to find the file path to a file called SAM, usually under 'Windows/System32/config/SAM'.
We will first mount the windows partition first, so that we can access windows directory.
Step 6 :
Type in the following commands in shell console
"mkdir /mnt/sda1" and press Enter
Type again "mount -t ntfs /dev/sda1 /mnt/sda1" and press Enter.
Step 7 :
Now in the shell console type in "/pentest/passwords//chntpw/chntpw -i <SAMFILEPATH>"
Example in this case:
"/pentest/passwords//chntpw/chntpw -i /Windows/System32/config/SAM".
(Note: Windows path should be case sensitive). This will load SAM in chntpw.
Step 8 :
Type in 1. "Edit user data and passwords". It will display all username of Windows partition.
Step 9 :
Type in the username of the Windows account you want to change the password in.
Step 10 :
Type in 1 to clear the password and press Enter.
You can also type in 2 to edit it.
Step 11 :
Once done, type in the username of the Windows account you changed or cleared the password on and Type in 4.
"To unlock account" and press Enter. This will unlock the account and enable it for using.
Step 12 :
Type in "!" and press Enter to return to main menu of chntpw.
Step 13 :
Type in"q" and press Enter to quit chntpw.
Step 14 :
Chntpw will confirm about the changes you made to SAM.
Type "y" and press Enter to Write hive files.
Step 15 :
Done!
Logout and Close Backtrack 4 and restart Windows!
Warning
- Do NOT use this method on anyone else computer but your own.
- Please notice that Backtrack is not very stable and can mess up your computer. Do this at your own risk!
Thanks For Visiting My Blogg.
___________________________________________
Subscribe to:
Posts (Atom)


